What are Activities?
Activities are an easy way to create custom screens, and the best part: you don't need to know OpenGL to create most activities. Only if you want to display something truly custom, knowing OpenGL could be beneficial. However, it still wouldn't be much of a problem if you don't because you have many other possibilities to render anything you want.
In the following pages, we will explain how to create custom activities, create and use widgets in your Activities, and theme them with LSS. It can be a bit much to take in at first, but it's worth it.
Examples are shown on every page; you will find a link to the section with the example on every page within the first paragraphs. Click here to see the first example.
Important Note
Remember that we're explaining the Activity System in multiple steps. On this page, we will explain how to create bare Activities without any widgets or LSS. This is for example purposes only; we highly recommend using Widgets and LSS in your Activities, as the system is not optimized for bare Activities. If you create custom screens, in order to be accepted in our addon store, your screens need to be created with this system, and they need to support theming.
Creating a Bare Activity
All you need to do to create an Activity is create a new class and inherit either SimpleActivity or Activity. The SimpleActivity and Activity only have one difference. By inheriting SimpleActivity, your Activity renders the default theme background; by inheriting just Activity, you'll have an empty Activity that you can 100% customize. For our example, we'll be inheriting the SimpleActivity as we register it as a NavigationElement (so it will be displayed as another tab in the navigation).
Now we need to add the AutoActivity annotation at the top of our class, and the Activity will open.
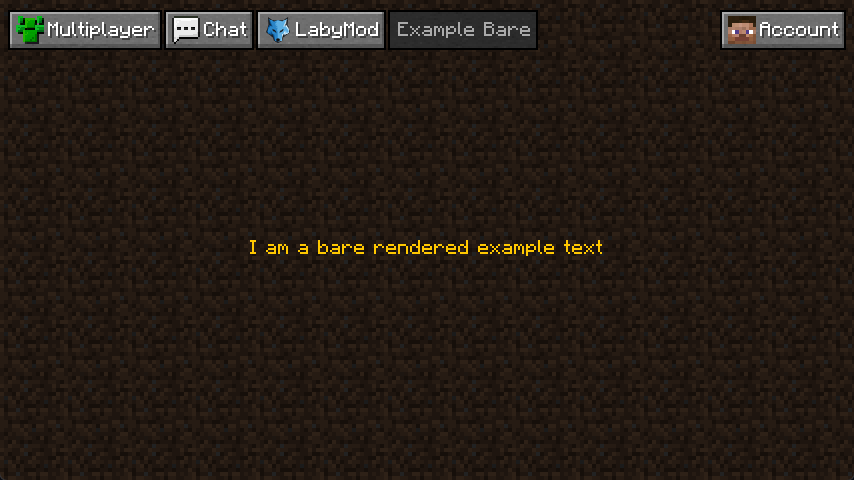
In this case, we want to render a text at the center of the screen, and as we are creating a bare Activity, we'll overwrite the render method. (please keep in mind that the super call has to be at the head of the method. Otherwise, our text will be rendered beneath the background).
All we have to do now is to get the bounds of the Activity by declaring this.bounds() as a local variable (the bounds represent the position and size of activities and widgets - more on that in the part about LSS). Then we need get the TextRenderer by calling this.labyAPI.renderPipeline().textRenderer() as we will render our text with that renderer.
Now to the rendering, apply your text to the renderer by using the setter text; our text is the String "I am a bare rendered example text", so we use textRenderer.text("I am a bare rendered example text"); after that, we set our position with the bounds we got before. As we want the text centered we need the centerX and centerY float and set them via textRenderer.pos(bounds.getCenterX(), bounds.getCenterY()).
We could theoretically render it now, but we want to adjust the renderer a bit. As of now, the text would start at the centered x position, but we want it centered, so we add textRenderer.centered(true). Now, as this text will be rendered in a menu, we don't want a shadow; all we need to do to remove the shadow is add textRenderer.shadow(false), maybe add a bit of color with textRenderer.color(Color.ORANGE.getRGB()).
Now, as all is set as we want, we can call textRenderer.render(stack), and we are finished.
Bare Activity Result
Looking back at what we just wrote, this is what the code and result would look like:
@AutoActivity
public class ExampleBareActivity extends SimpleActivity {

  @Override
  public void render(Stack stack, MutableMouse mouse, float partialTicks) {
    super.render(stack, mouse, partialTicks);

    Bounds bounds = this.bounds();
    TextRenderer textRenderer = this.labyAPI.renderPipeline().textRenderer();
    textRenderer.text("I am a bare rendered example text")
        .pos(bounds.getCenterX(), bounds.getCenterY())
        .centered(true)
        .shadow(false)
        .color(Color.ORANGE.getRGB())
        .render(stack);
  }
}
